Ollama-OpenWebUIは、ChatGPTのようなインターフェイスでローカルLLMが使える無料のツールです。
Ollamaを使えば、DeepSeek-R1やLlamaなどの人気LLMをローカル環境で動かすことができます。
この記事では、Ollama-OpenWebUIの環境構築からモデルを使ったテキスト生成の方法まで紹介します。

Ollama-OpenWebUIとは
Ollamaは、ローカル環境でLLMモデルを動かすことができる無料のツールです。
DeepSeek-R1やLlamaなど人気モデルをダウンロードして、APIを使わずにLLMをローカルで実行できます。
さらにOpenWebUIを併用することで、ChatGPTのような分かりやすいインターフェイスが利用できます。
OllamaをPythonで使用する方法は?

Ollama-OpenWebUIの実行環境

LLMのモデルを使う際に、GPUが必要になります。
この記事では、次のようなGPUを搭載した環境を用意しています。
- GPU:NVIDIA A100
- GPUメモリ(VRAM:80GB)
- OS:Ubuntu 22.04LTS
WindowsにUbuntuをインストールするには?

Ollama-OpenWebUIの環境構築

この記事では、OllamaとOpenWebUIの2つのDockerコンテナを使って構築します。
Ollamaはモデルによるテキスト生成を行い、OpenWebUIはインターフェースを提供する役割になります。
Dockerの詳しい使い方を解説!

docker-compose.ymlを作成します。
mkdir ollama
cd ollama
nano docker-compose.yml
開いたdocker-compose.ymlファイルに以下の記述をコピーして貼りつけます。
services:
  ollama:
    image: ollama/ollama
    runtime: nvidia
    container_name: ollama
    ports:
      - "11434:11434"
    volumes:
      - .:/app/ollama
    deploy:
      resources:
        reservations:
          devices:
            - driver: nvidia
              count: 1
              capabilities: [gpu]

  open-webui:
    image: ghcr.io/open-webui/open-webui:main
    ports:
      - "8080:8080"
    volumes:
      - .:/app/open_webui
    extra_hosts:
      - "host.docker.internal:host-gateway"

volumes:
  ollama:
open-webui:docker-compose.ymlの記述をもとに、Dockerコンテナを構築して起動します。
docker compose upコンテナが起動したら、ローカルPCの「ブラウザの検索窓」に以下のURLを入力し、Enterを押すとOllamaの画面が表示されます。
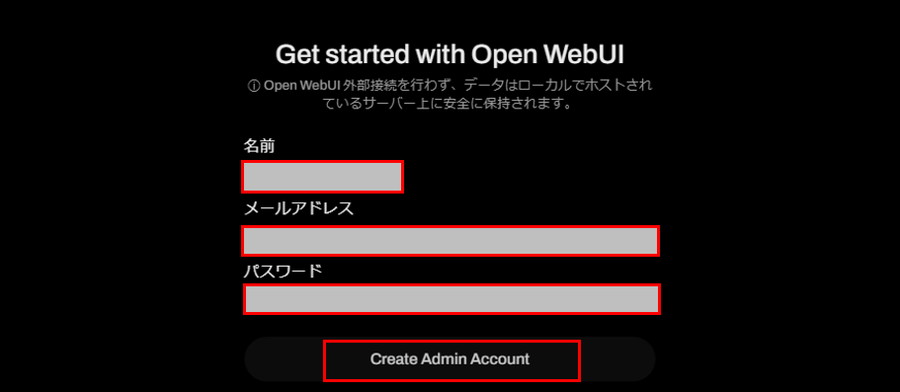
http://localhost:8080/Ollama-OpenWebUIの画面に遷移したら、「Get Started」をクリックします。

「名前」「メールアドレス」「パスワード」を設定し、「Create Admin Account」をクリックすると、ログインが完了です。
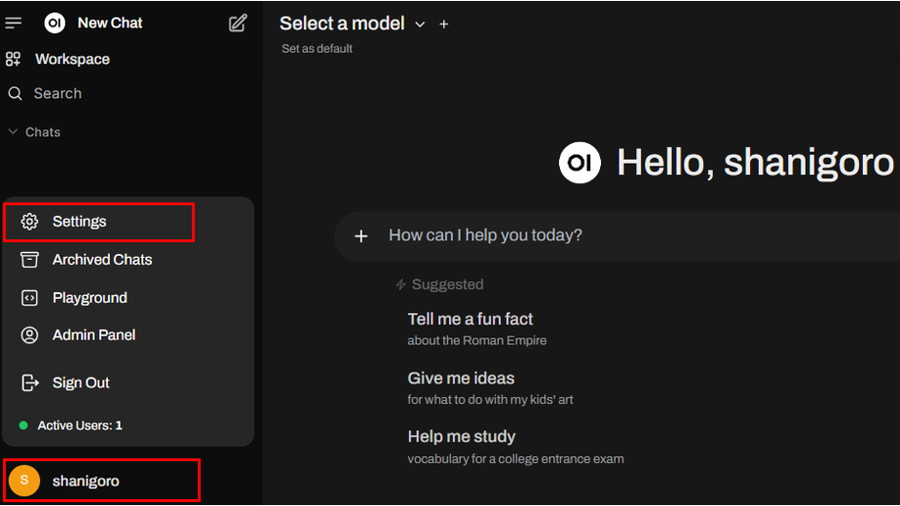
Ollamaにモデルを設定していきます。
右下の[丸い]アイコンをクリックし、「Settings」を開きます。
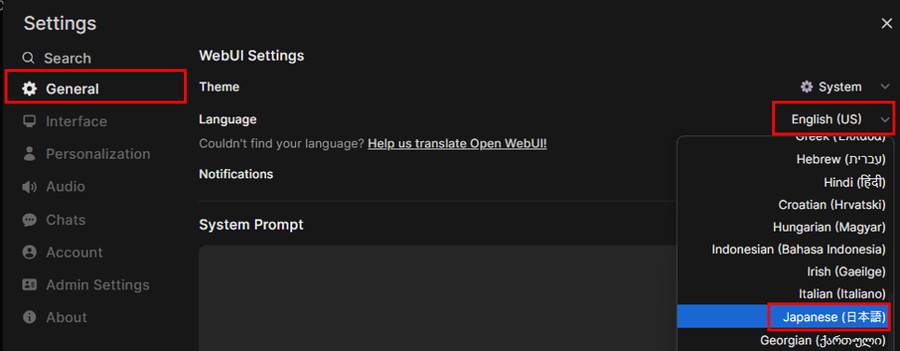
サイドバーから「General」を選択し、「Language」のプルダウンから「Japanese(日本語)」を選択します。
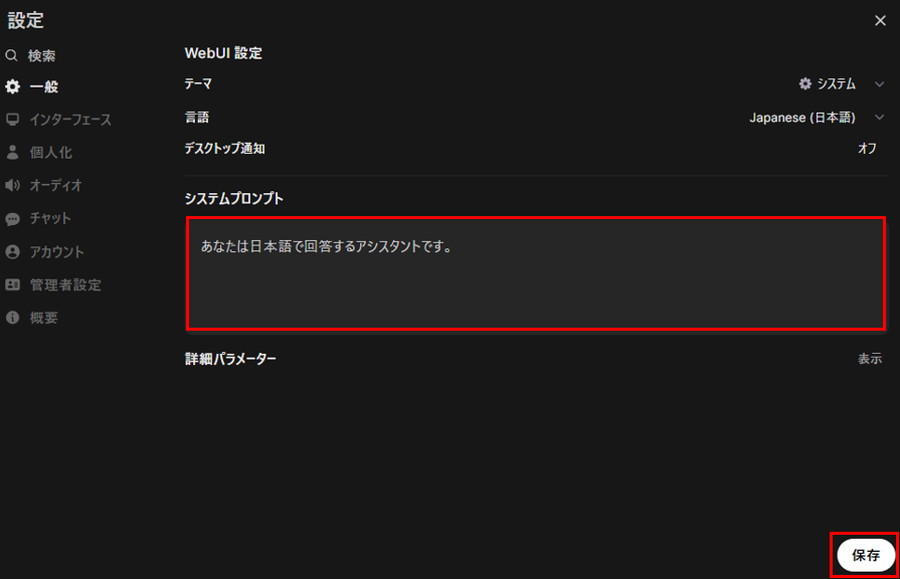
「システムプロンプト」に「あなたは日本語で回答するアシスタントです」と入力し、「保存ボタン」を押します。
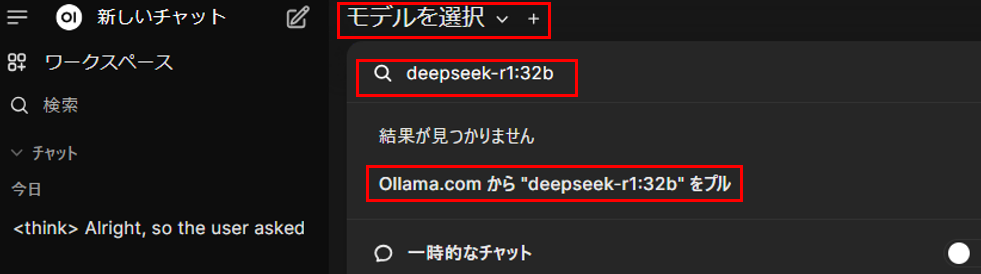
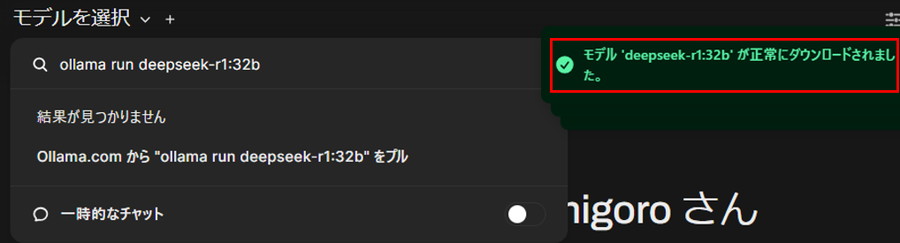
ヘッダーの「モデルを選択」をクリックし、検索窓に「モデルID」(例:deepseek-r1:32b)を入力し、「Ollama.comから”モデルID”をプル」をクリックすると、モデルのダウンロードが開始します。
モデルIDは、Ollama公式サイトから確認ができます。

- deepseek-r1:1.5b
- deepseek-r1:32b
- llama3.2
- llama3.2:1b
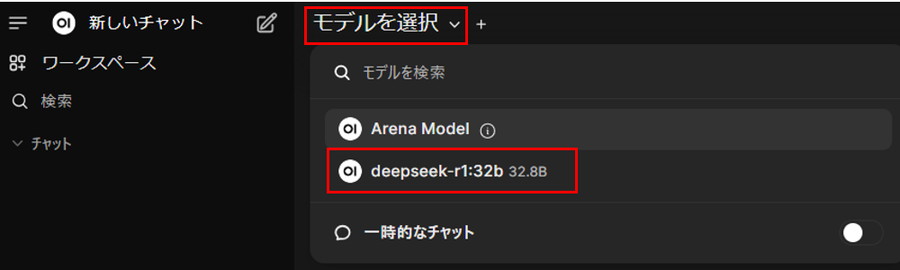
ヘッダーの「モデルを選択」をクリックし、ダンロードした「モデルID」(例:deepseek-r1:32b)を選択するとモデルの設定が完了です。
Ollama-OpenWebUIで日本語LLMを使うには?
OllamaをPythonで使う方法は?
Ollama-OpenWebUIでテキスト生成

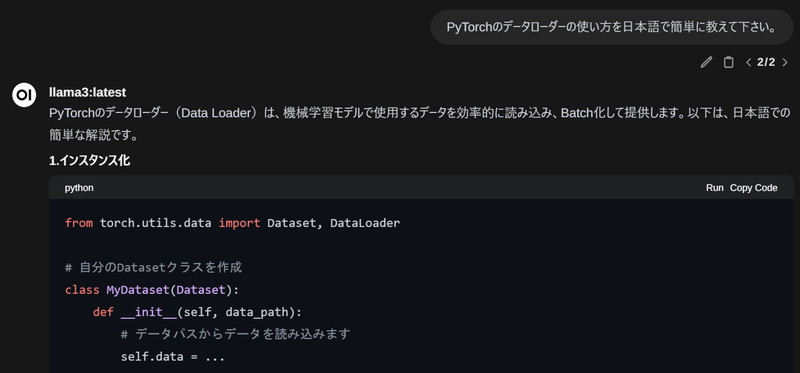
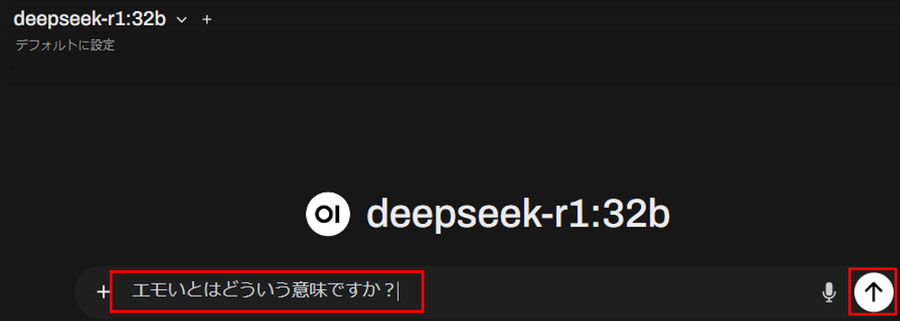
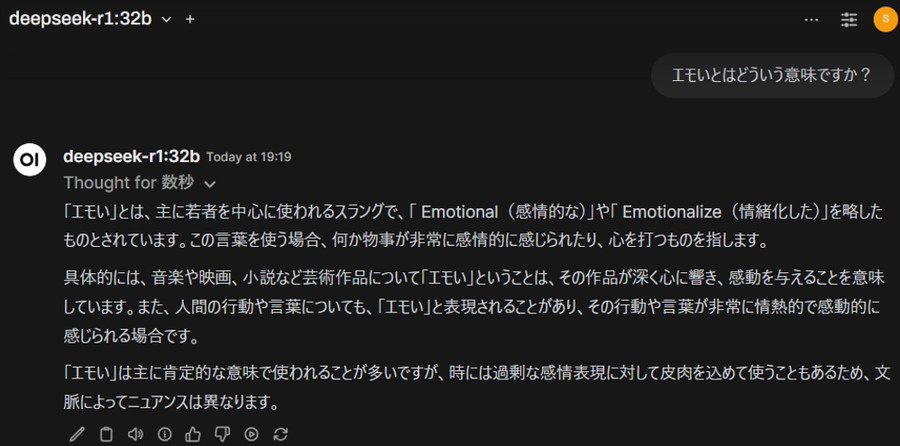
Ollama-OpenWebUIを使ってテキスト生成をしてみます。
「プロンプト」を入力して、「上矢印」ボタンを押すと、LLMが回答を開始します。
Ollama-OpenWebUIで複数のモデルを同時実行する

Ollama-OpenWebUIで複数のモデルを同時に実行してみます。
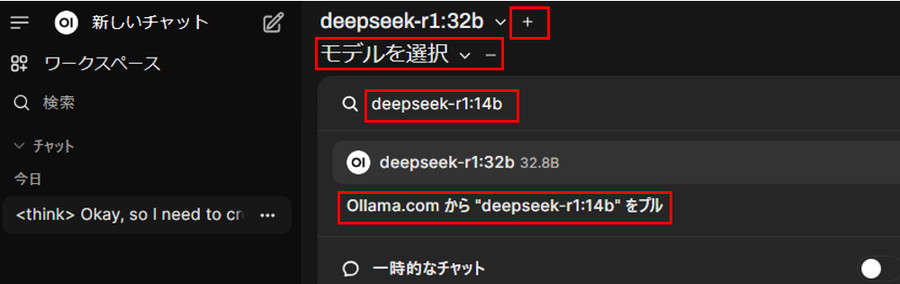
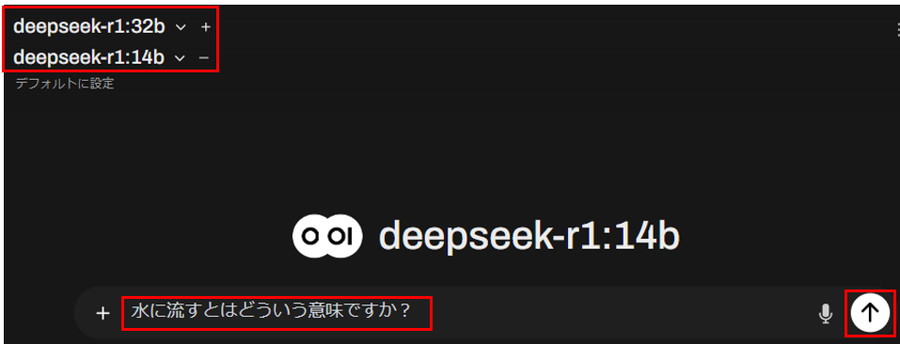
ヘッダーから「+」ボタンを押し、「モデルを選択」をクリックします。
検索窓に「モデルID」(例deepseek-r1:14b)を入力し、「Ollama.comから”モデルID”をプル」を選択します。
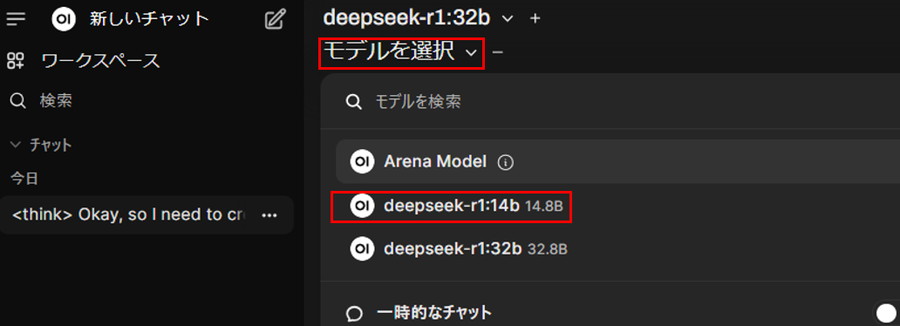
モデルのダウンロードが完了したら、「モデルを選択」をクリックし、「モデルID」(例deepseek-r1:14b)を選択します。
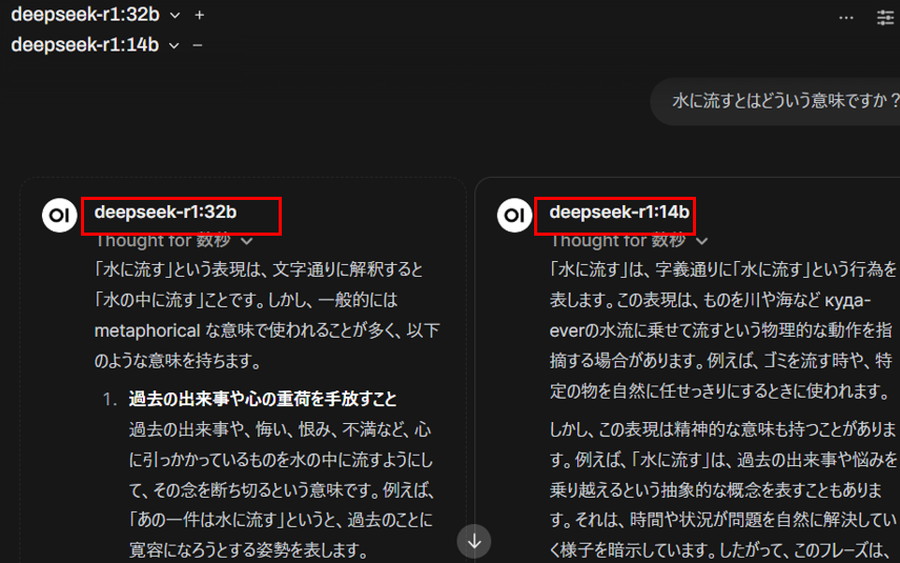
「プロンプト」を入力し、「上矢印」ボタンを押します。
複数のモデルからテキストが生成されていることが分かります!
生成AI・LLMのコストでお困りなら
GPUのスペック不足で生成AIの開発が思うように進まないことはありませんか?
そんなときには、高性能なGPUをリーズナブルな価格で使えるGPUクラウドサービスがおすすめです!
GPUSOROBANは、高性能GPU「NVIDIA H200」を業界最安級の料金で使用することができます。
NVIDIA H200は、生成AI・LLMの計算にかかる時間を大幅に短縮することが可能です。
クラウドで使えるため、大規模な設備投資の必要がなく、煩雑なサーバー管理からも解放されます。